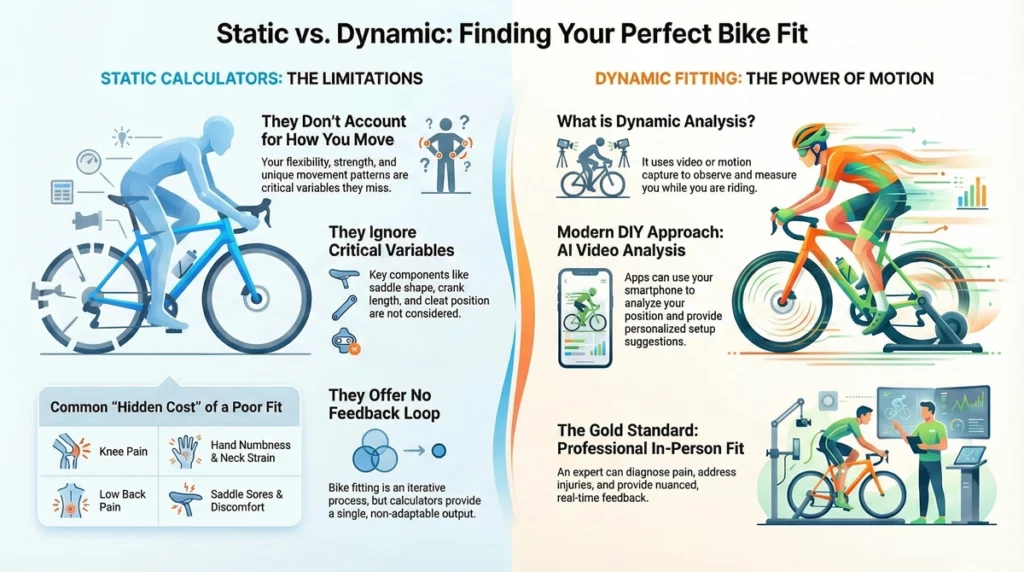
While online calculators provide a useful starting point for frame size and saddle height, they often fail because they don’t account for how you move. The most reliable calculator for saddle height is the Specialized/Retül app, and the most accurate in-depth static tool is the Wrench Science Fit System. However, dynamic tools utilizing AI video analysis, such as MyVeloFit, are the industry standard for evaluating your actual position and preventing injury because they analyze your movement and biomechanics.
- Why Proper Bike Fit is a Mandatory Investment
- Static Bike Fit Calculators: The Basic Starting Point
- Dynamic AI Video Analysis: The Hybrid Fit Solution
- Professional Dynamic Fitting: The Gold Standard
- Essential Bike Fit Measurements & Optimization Techniques
- Troubleshooting Common Bike Fit Aches and Pains
- Conclusion: Making Your Final Bike Fit Decision
Why Proper Bike Fit is a Mandatory Investment

Let’s be honest – spending money on a proper bike fit might seem like a luxury when you’ve already dropped a small fortune on your new carbon beauty. But trust me, it’s not just for the pros or the ultra-serious cyclists!
A good bike fit is like getting a suit tailored instead of grabbing something off the rack. It’s the difference between “this is okay” and “wow, this feels amazing!” When your bike fits you perfectly:
- You’ll be 40-60% more comfortable on those long weekend rides (goodbye, numb hands and aching back!)
- Your power output can jump up by 15% (hello, Strava PRs!)
- You’ll dramatically reduce your chances of those nagging repetitive strain injuries that make you dread getting on the saddle
- Common issues like knee pain, tingly fingers, and that weird neck kink? They can become a thing of the past
Static Bike Fit Calculators: The Basic Starting Point

Remember when you tried using an online quiz to find your soulmate? Static bike fit calculators are kinda like that – they’ll get you in the ballpark, but don’t expect true love at first pedal stroke.
The Fundamental Flaws of Static Calculators (Why They Fall Short)
These calculators are like trying to find the perfect pair of jeans by just measuring your waist and inseam. There’s so much more to the story! Here’s where they go wrong:
- They ignore how you actually move. Are you flexible like a yoga instructor or stiff as a board? Do you pedal with your knees pointing inward? Static calculators have no clue!
- They miss critical variables. Things like your saddle width (yes, your sit bones matter!), cleat position, and crank length all hugely impact your comfort, but calculators just shrug and say “whatever” to these details.
- They’re one-and-done. Real bike fitting is like dating – you try something, see how it feels, make adjustments, and repeat until it’s just right. Calculators just spit out numbers and wish you good luck.
Static Calculator Reviews: Which Ones Are Actually Worth Your Time?
I’ve spent embarrassing amounts of time playing with these calculators (so you don’t have to), and here’s my honest breakdown:
| Calculator | Best For | The Real Deal |
|---|---|---|
| Wrench Science Fit System | Getting detailed initial measurements | The best free static tool out there. Super accurate for top tube, saddle height, and stem recommendations. Just one warning – their stack height suggestions are ridiculously low, like “yoga master contortionist” low. |
| Specialized/Retül Sizing App | Quick frame size & saddle height check | Surprisingly accurate! It’ll get your saddle height within millimeters of what a pro would recommend. Uses just height and shin length, so it’s quick. |
| Competitive Cyclist | Riders who prefer comfort over speed | The OG calculator that’s been around forever, but it doesn’t accept decimal measurements (seriously, it’s 2025 guys!). Tends to suggest shorter, more upright positions. |
| Jenson Bike Fit Calculator | Nobody, honestly | I wouldn’t trust this one to size a tricycle. Testing showed it was wildly off on basically everything. |
Key Saddle Height Formulas (The Ballpark)
Need a quick starting point for saddle height? These methods will get you close:
- The 109% Method: Measure your inseam (in cm) from floor to sit bones, then multiply by 1.09. That’s your saddle height from pedal to saddle top. This is my personal go-to method.
- LeMond Method: Multiply your inseam by 0.883 (measured from the bottom bracket to saddle top). Classic, but I find it usually runs a bit low for modern riding positions.
- The Heel Method: Put your heel on the pedal at the bottom of the stroke – your leg should be straight but not locked. Super simple but surprisingly effective in a pinch!
Dynamic AI Video Analysis: The Hybrid Fit Solution
Welcome to the future, where AI can analyze your riding form better than most bike shop employees! These tools are like having a professional fitter’s eyes without the awkward small talk.
MyVeloFit: The A.I. Approach
MyVeloFit is basically the TikTok of bike fitting – upload a video, and AI works its magic:
- The Process: You’ll do a quick mobility assessment (can you touch your toes?), record yourself riding on a trainer for 15 seconds, and upload the video.
- The Magic: Their AI compares your position to thousands of professional fits, checking your posture, pedaling symmetry, and all those fancy joint angles pros care about.
- The Results: You get super detailed recommendations for saddle height, setback, and handlebar position – tailored specifically for your body and riding style.
- The Coolest Part: It’s iterative! Make an adjustment, upload another video, and see if you’re moving in the right direction. It’s like having a fitter on speed dial.
Bike Fast Fit App (iOS Example)
Not quite ready to go full AI? The Bike Fast Fit app is a nice middle ground:
- It uses your smartphone camera to analyze your riding position in real-time.
- The app recognizes your body parts (no, not in a creepy way) and calculates important angles.
- You can adjust points frame-by-frame if the app gets confused (which happens… technology, right?).
- It works for pretty much any bike – road, gravel, mountain, even those awkward tri bikes.
- Pro tip: For better results, stick little dots on your knee/hip/ankle joints. Yes, you’ll look silly, but you’ll get much more accurate readings!
Professional Dynamic Fitting: The Gold Standard
Let’s be real – if you’re dropping $5K+ on a bike, spending a few hundred more for a professional fit is like putting premium gas in your Ferrari. It just makes sense.
Professional fits using systems like Retül are the bike equivalent of getting a full medical workup with all the fancy machines. They capture your movement in 3D while you’re actually pedaling, with accuracy down to the millimeter.
A pro fit covers things you probably didn’t even know mattered:
- Q-factor (how wide your feet are spaced)
- Crank length (which can make or break your knees)
- Cleat position (the source of so many mystery pains)
- Saddle shape and tilt (your butt will thank you)
- How your specific body quirks (we all have them) affect your position
When to bite the bullet and pay for a pro fit:
- When you first get serious about cycling (prevent problems before they start)
- After buying a new bike (especially if it’s significantly different from your old one)
- If you’re experiencing persistent pain that won’t go away
- When training for that big century ride or race you’ve been dreaming about
Essential Bike Fit Measurements & Optimization Techniques

Let’s break down the most important measurements in plain English:
Saddle Height and Positioning
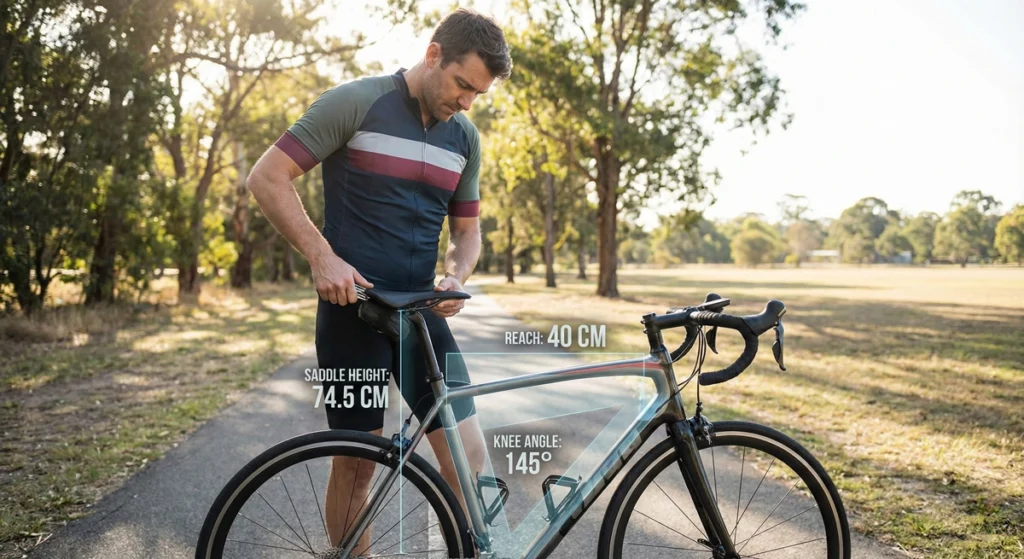
- The Magic Knee Bend: Aim for a 25-35° bend in your knee at the bottom of your pedal stroke. Too straight = knee pain. Too bent = inefficient power.
- The Hip Rock Test: If you’re rocking your hips side to side while pedaling, your saddle’s too high – you’re stretching for the pedals like a kid trying to reach the cookie jar.
- The KOPS Method: When your cranks are horizontal, drop an imaginary plumb line from your kneecap – it should hit right through the pedal spindle. This helps with your fore/aft positioning.
- Weight Distribution: You want about 60% of your weight on the back and 40% on your hands. Too much weight forward and you’ll be shaking your hands out every 10 minutes.
- Saddle Tilt: Start with it perfectly level. Tilted down? You’ll slide forward and put too much pressure on your hands. Tilted up? Hello, soft tissue pain (ouch!).
Reach and Handlebar Optimization
- Finding Your Perfect Reach: This involves your frame size, stem length (usually between 70-120mm), and handlebar type. Too long and you’ll feel stretched like you’re reaching for the TV remote; too short and you’ll feel cramped like you’re riding in coach class.
- Handlebar Width: Should roughly match your shoulder width. Too wide and you’re catching extra wind like a sail; too narrow and you’re restricting your breathing.
- Handlebar Height: Higher = more comfortable, better visibility, happy neck. Lower = more aerodynamic, faster, potentially achier back. It’s the classic comfort vs. speed tradeoff!
Cleat Position
- Fore/Aft: Put the cleat right under the ball of your foot. It’s where nature intended you to push.
- Rotation: Start neutral, then adjust if your knees naturally point in or out. Your cleats should accommodate your natural movement, not force your body into unnatural positions.
- Float: If you have knee issues, more float (wiggle room in the cleat) is usually your friend. It’s like giving your joints a little breathing room.
Troubleshooting Common Bike Fit Aches and Pains
Here’s your cheat sheet for when things don’t feel right:
| Problem | Likely Culprit | Easy Fix |
|---|---|---|
| Front Knee Pain | Saddle too low/forward | Raise that saddle gradually; slide it back a bit |
| Back of Knee Pain | Saddle too high/back | Lower your throne; bring it forward |
| Numb Hands | Too much weight forward | Check handlebar height/reach; adjust saddle angle |
| Foot Numbness | Cleat problems or tight shoes | Reposition cleats; loosen shoes (or time for wider ones!) |
| Lower Back Pain | Reach too long or bad saddle angle | Shorten your reach; check that saddle isn’t tilted weird |
Conclusion: Making Your Final Bike Fit Decision
Look, free online calculators like Wrench Science are great starting points – especially if you’re just trying to figure out what size frame to buy. But they’re like using Google to diagnose a medical condition – helpful to a point, but not the whole story.
Bike fit is an ongoing conversation between you and your bike, not a one-time calculation. Your body changes, your flexibility evolves, and your riding goals shift over time.
For maximum comfort, efficiency, and keeping those pesky injuries at bay, invest in something that actually watches how you move – whether that’s MyVeloFit’s clever AI system or splurging on a full professional fit with all the bells and whistles.
Key Takeaways for Your Perfect Bike Fit:
- Measure accurately (and yes, true inseam means measuring to your sit bones, not just your crotch – awkward but necessary!)
- Aim for that sweet spot of 25-35° knee bend at the bottom of your pedal stroke
- Get your weight distribution close to that 60% back, 40% front ratio
- If your bike feels more like a medieval torture device than a joy to ride, it’s probably time to see a professional fitter
Remember, the most expensive bike in the world feels terrible if it doesn’t fit you properly. And even a budget bike can feel like a dream machine when it’s dialed in just right. Happy pedaling!